Hi All! I'm planning on assembling my first piston air cannon very soon. I just had a few safety concerns before I move forward.
My planned layout is as follows:
(Cannon will be pressurized from the vertical endcap coming off the back tee)
Also, here is the tank I'm thinking about using:
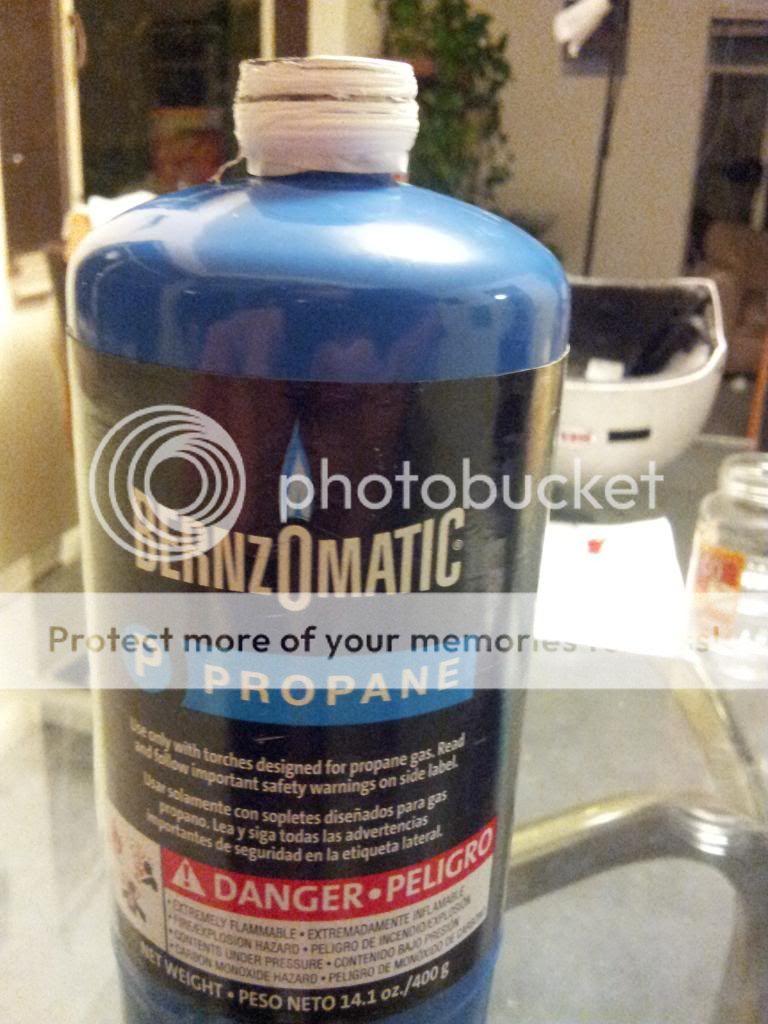
Questions:
1) I'm thinking about using that nylon hose barb adapter threaded backwards as shown inside the front 1/2" tee. Other than the cannon firing if it fails, can you all see any other blatant safety concerns with that?
2) The threads on the tank I'm planning on using don't excactly line up with the adapter I'm using. With it being hand-tightened, it feels very solid and is airtight, but I feel that it could possibly still blow off...any insights?
3) Any other insights into this layout? You all are brilliant when it comes to air cannon design, and I extremely value your insight!
Thanks in advance!
My First Piston Air Cannon! - Safety Concerns
- jrrdw
- Moderator
- Posts: 6572
- Joined: Wed Nov 16, 2005 5:11 pm
- Location: Maryland
- Has thanked: 39 times
- Been thanked: 22 times
- Contact:
Have you removed the valve out of the top of that tank? You have to be really careful messing with them until you get them opened up and cleaned out. Others here can tell you better about them wait for more insight than mine. Don't want you/anyone getting hurt with these tanks, once adapted they work well I've seen.
What are you using for a piston?
I just emptied the propane tank....And subsequently froze a large section of ground in my back yard....Pretty Dramatic!
Once I'm 100% sure the thing is empty, I'm going to drill out the top valve tonight by using a drill press and slowly increasing the bit size.
For the piston, I'm planning on filling the 1/2" adapter with hot glue, then screwing in a circular rubber gasket from some sheet rubber. I'm also going to make a sheet rubber O-ring backstop in the reducer behind the piston.
- jackssmirkingrevenge
- Five Star General
- Posts: 26203
- Joined: Thu Mar 15, 2007 11:28 pm
- Has thanked: 569 times
- Been thanked: 345 times
Fill the tank with water then empty it before taking any tools to it!
What pressures are you planning on running at? For a small bore and heavy projectile, you,re going to need pretty high pressures to reach the sort of altitude you have in mind.
I suggest downloading GGDT: http://www.thehalls-in-bfe.com/GGDT/
It will give you a clue as to what sort of altitudes you can reach, of course it will be hard to model wire drag but at least you will know that without the wire you can go beyond what you already plan.
Best to model your launcher before starting a build.
How don,t they line up exactly? different number of threads per inch?The threads on the tank I'm planning on using don't excactly line up with the adapter I'm using. With it being hand-tightened, it feels very solid and is airtight, but I feel that it could possibly still blow off...any insights?
What pressures are you planning on running at? For a small bore and heavy projectile, you,re going to need pretty high pressures to reach the sort of altitude you have in mind.
I suggest downloading GGDT: http://www.thehalls-in-bfe.com/GGDT/
It will give you a clue as to what sort of altitudes you can reach, of course it will be hard to model wire drag but at least you will know that without the wire you can go beyond what you already plan.
Best to model your launcher before starting a build.
hectmarr wrote:You have to make many weapons, because this field is long and short life
- jrrdw
- Moderator
- Posts: 6572
- Joined: Wed Nov 16, 2005 5:11 pm
- Location: Maryland
- Has thanked: 39 times
- Been thanked: 22 times
- Contact:
And that's what winds up being the problem. Until they are flushed out there is always something left in them. That's what makes drilling them dangerous.Once I'm 100% sure the thing is empty, I'm going to drill out the top valve tonight by using a drill press and slowly increasing the bit size.
How would one go about filling a propane tank with water? I see there is some kind of valve on the side that looks like it was probably used to fill the tank originally, but I'm not sure what I should use to get water in there without drilling out the main valve.jackssmirkingrevenge wrote:Fill the tank with water then empty it before taking any tools to it!
. . .
How don't they line up exactly? different number of threads per inch?
What pressures are you planning on running at? For a small bore and heavy projectile, you,re going to need pretty high pressures to reach the sort of altitude you have in mind.
They're the same size diameter, just verrrry slightly different threads/inch. Here's a decent picture for reference:
And finally, this won't be the cannon I'll be using for my lightning trigger project. This is mostly a "Man, I haven't made a cannon in a while...might as well try making a piston before making something larger!" kind of cannon. I'll only be taking it up to the mid-limits of my bike pump (100-150 psi)
Mainly, I went to the hardware store to "blow off steam" after a rather taxing engineering midterm exam, and ended up walking out the door with a bunch of pipe fittings...Thanks for the GGDT link though! I heard that acronym being thrown around on the forums, and never bothered looking into it.
- jackssmirkingrevenge
- Five Star General
- Posts: 26203
- Joined: Thu Mar 15, 2007 11:28 pm
- Has thanked: 569 times
- Been thanked: 345 times
http://www.ebay.com/itm/Bernz-O-Matic-3 ... 1235906255
something like that on the tank, open the valve and dunk it under water until the bubbles stop
hectmarr wrote:You have to make many weapons, because this field is long and short life
- jackssmirkingrevenge
- Five Star General
- Posts: 26203
- Joined: Thu Mar 15, 2007 11:28 pm
- Has thanked: 569 times
- Been thanked: 345 times
Good man for even better performance, consider hooking up the ball valve closer to the QEV , the less volume there is in the pilot area the better.KurlyQ wrote:I built it! I decided to save myself the trouble, and went ahead and bought a 1/2" QEV valve!
hectmarr wrote:You have to make many weapons, because this field is long and short life