Page 1 of 1
KopperBess Update (w/pics)- 4th revision (now has a breech)
Posted: Mon Mar 23, 2009 1:48 pm
by Big-E
Hey all...
I revised my Kopperbess design a bit, I think I like it like this. Still debating a breech though, but it'll have to wait...
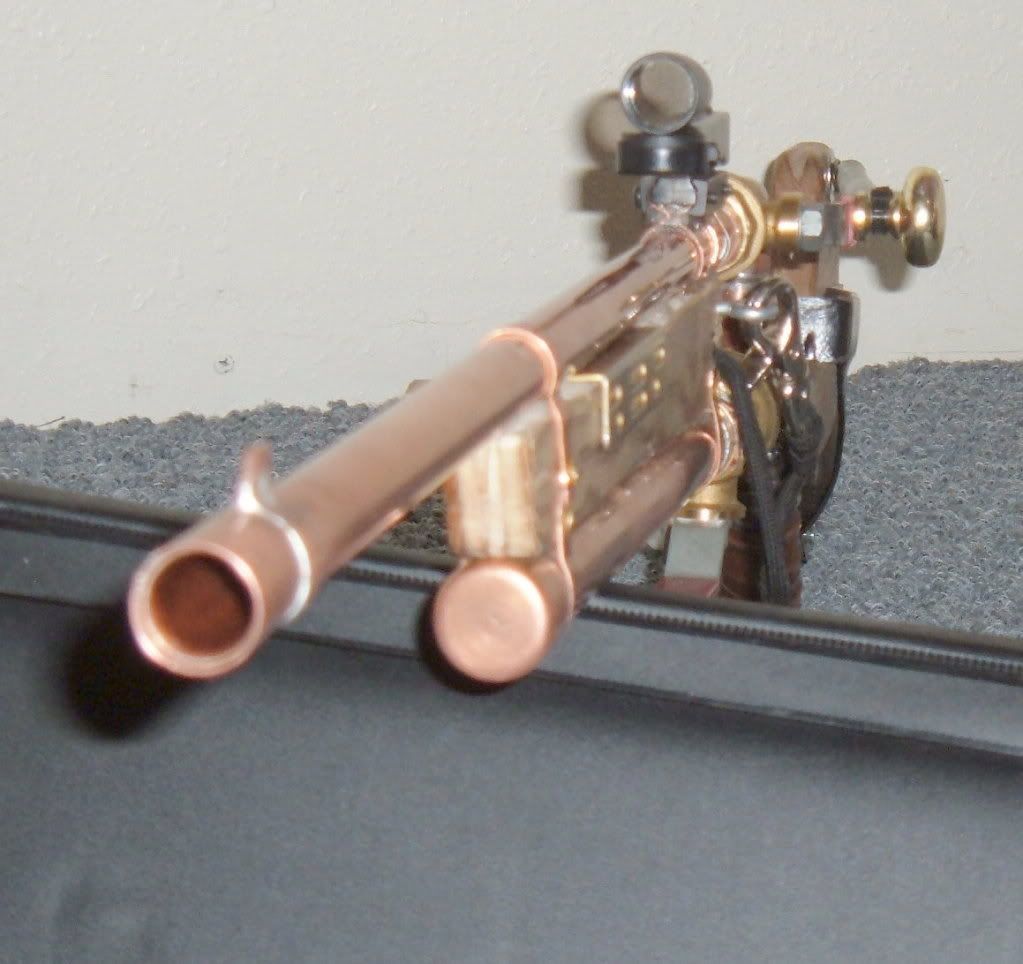
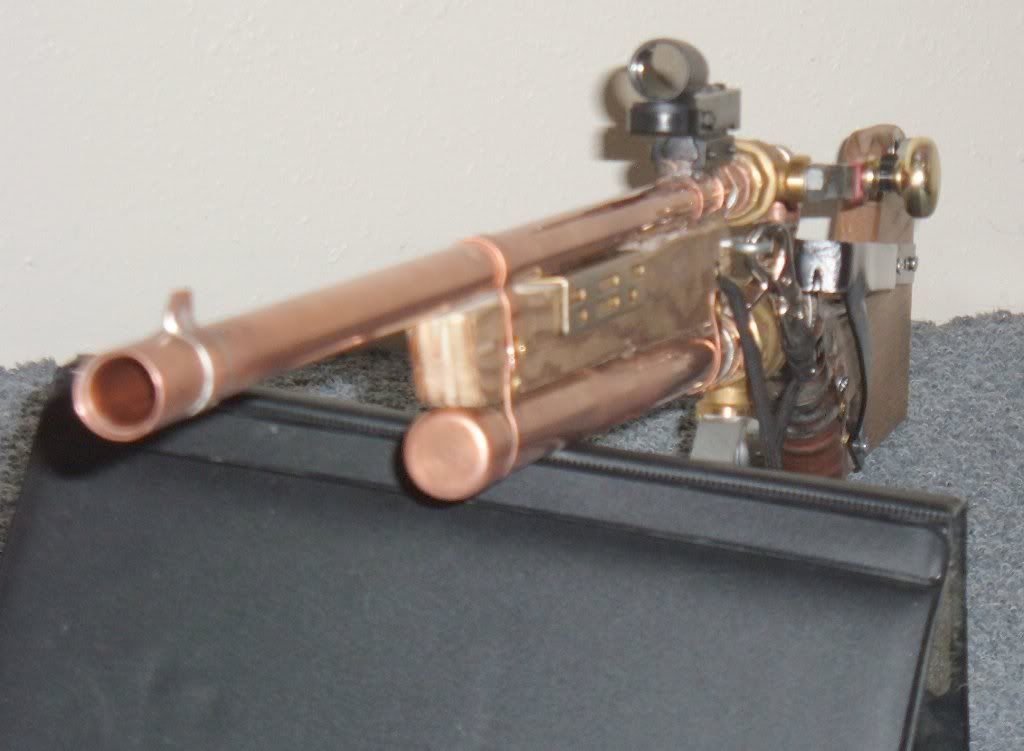
Edit ---> No longer waiting, I added a breech last week and I love it! here's pics:
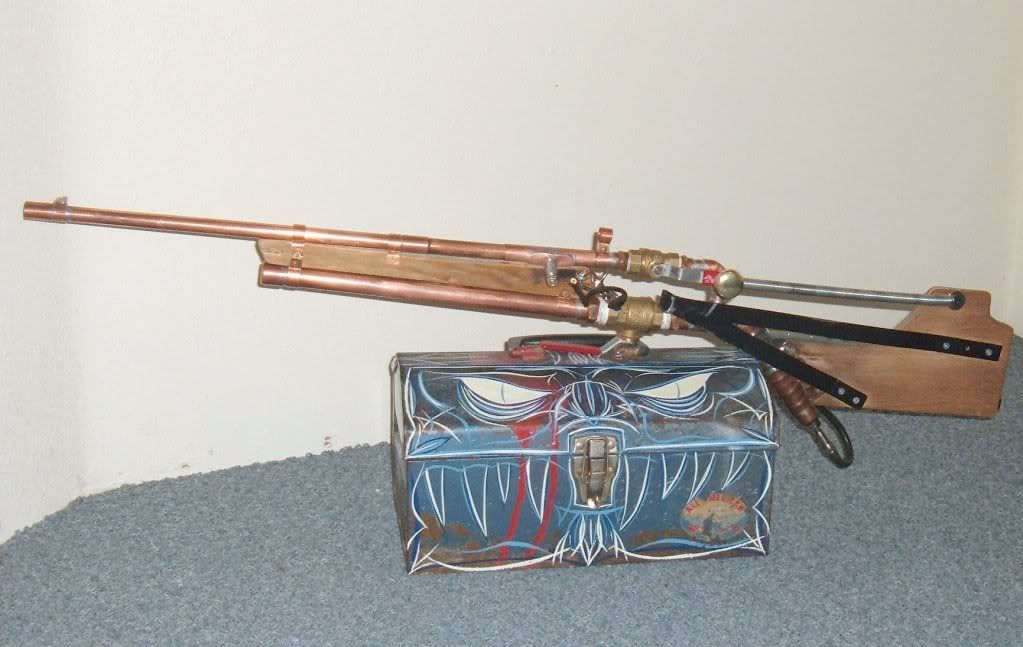
Breech closed
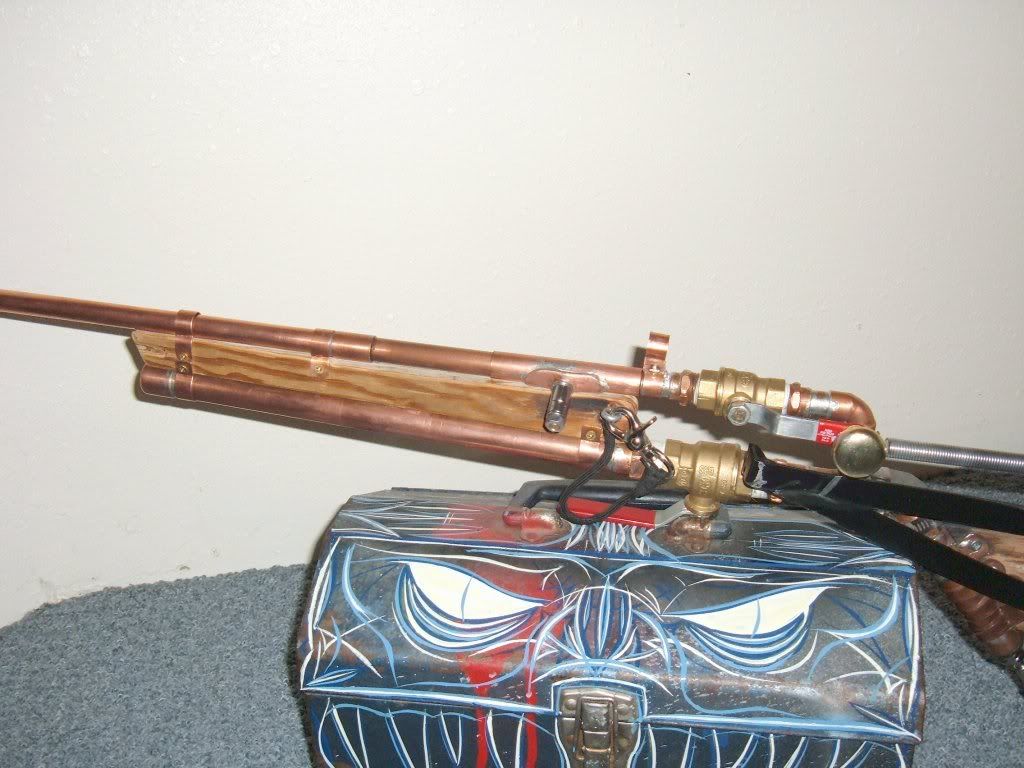
Breech open
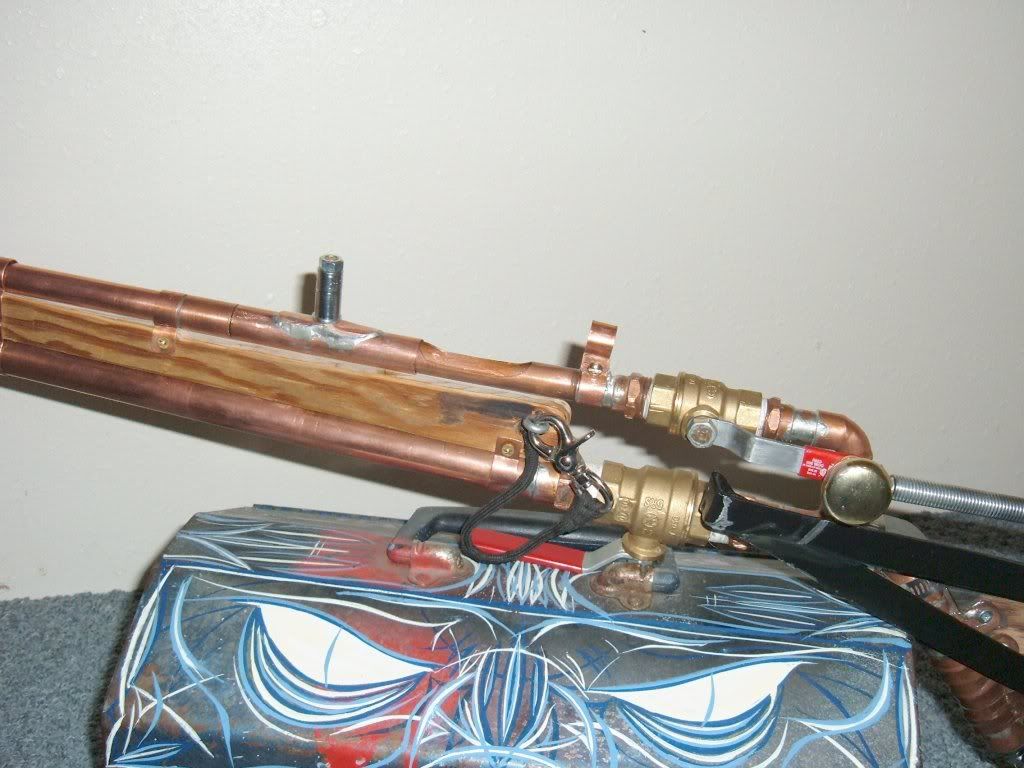
I also took off the red dot and put on a hooded rear sight. I'm lovin it.
If you want to comment, just keep adding to the thread. Thanks!
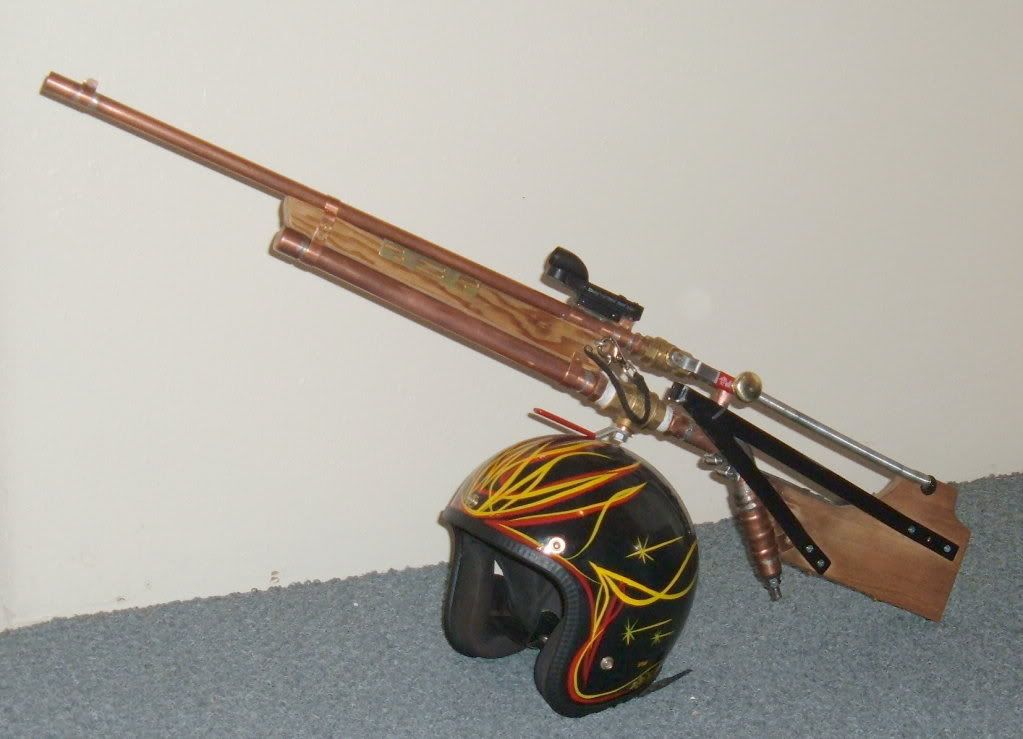
Heres some new features...
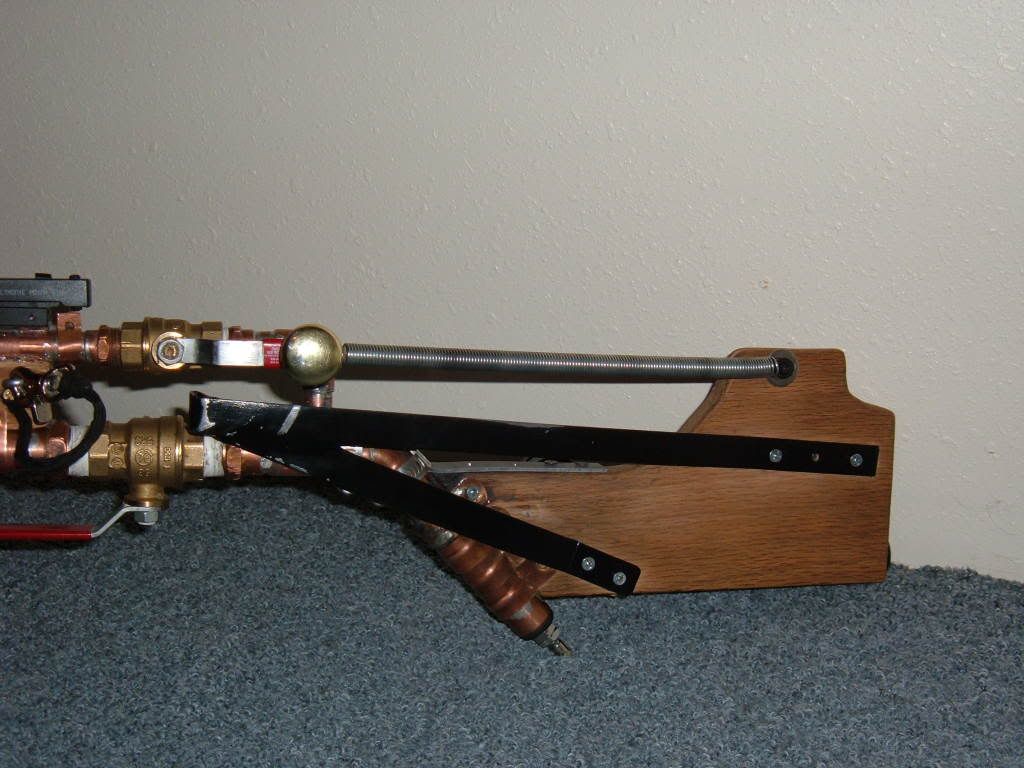
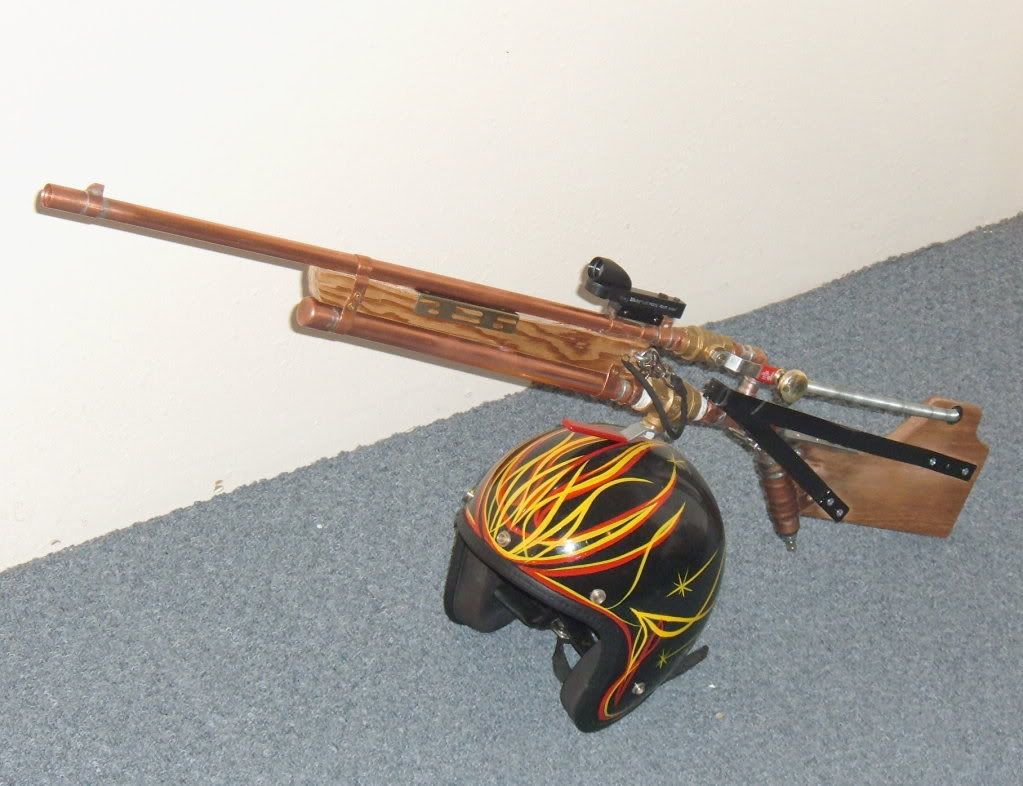
I adjusted the spring to a slightly higher position. I also reworked the valve a bit by chucking in a drill, lubing with synthetic ATF (a great all-purpose airgun lube) and spinning the ball for a few revs... Also gave me an idea for an automatic

Valve is like butter now, and cracks all the way open. I also welded the trigger spring up and painted it black (I know the paint will chip; it's to keep away rust, I want it to become weathered over time for that steam-punky look.)
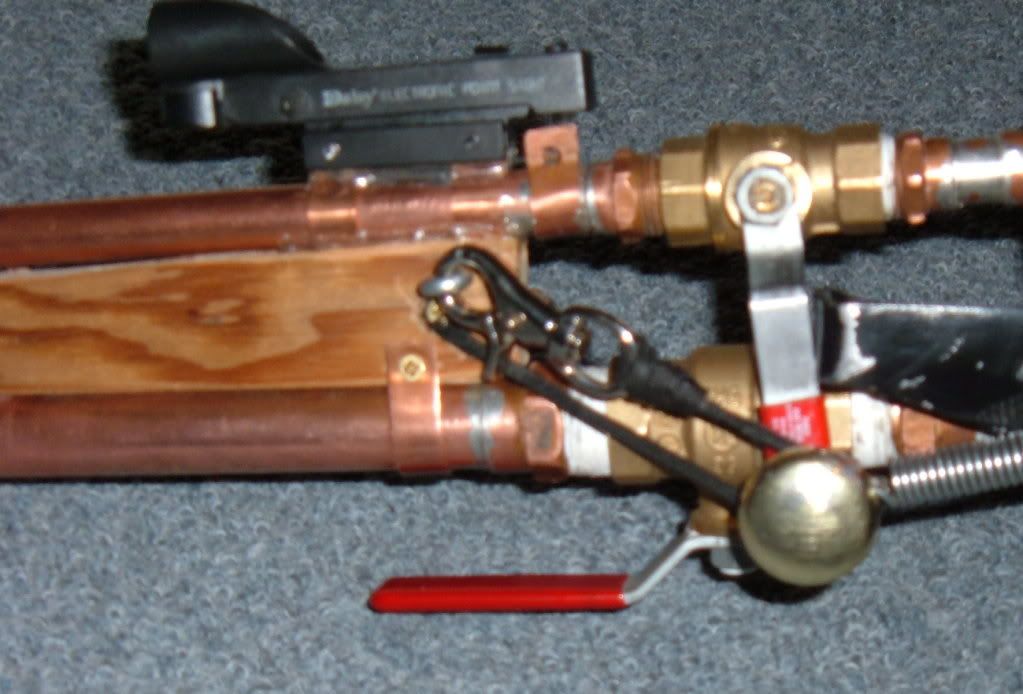
I also reintegrated an old feature from the early prototype; a safety leash; just for that extra bit of security when charging and loading this critter. Maybe simple, but it works!
Another reintroduced feature is the red-dot sight. definitely better accuracy, but I'm still dialing it in. I also added an old HDD bracket to the new foregrip area (also in the prototype). In this case, it let's me tweak the barrel a little bit. it also looks cool.
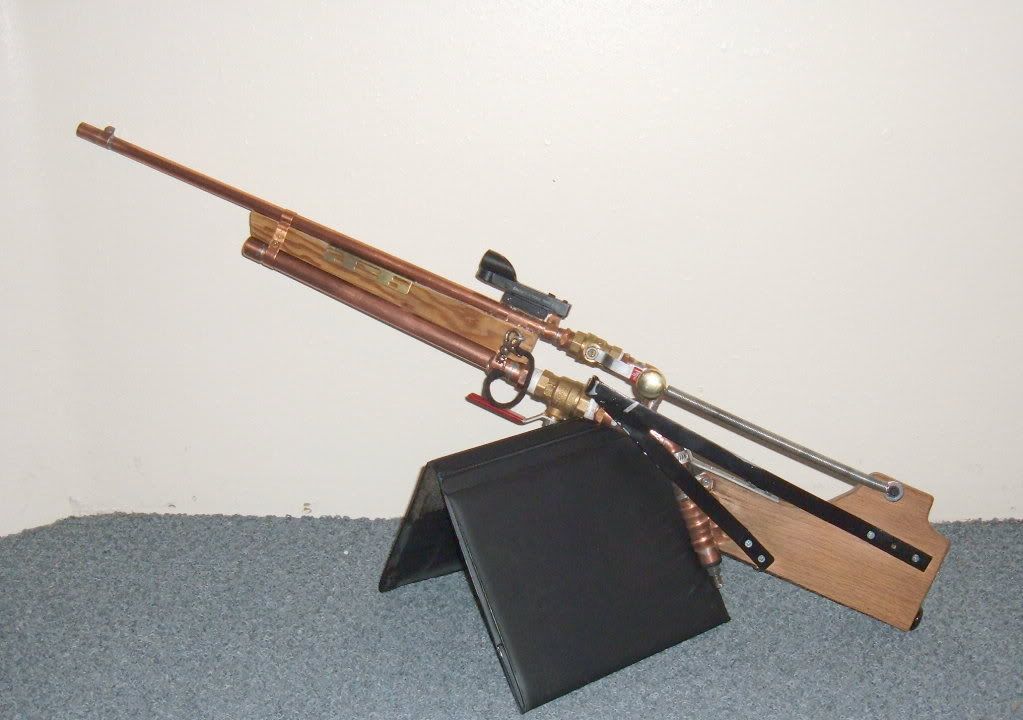
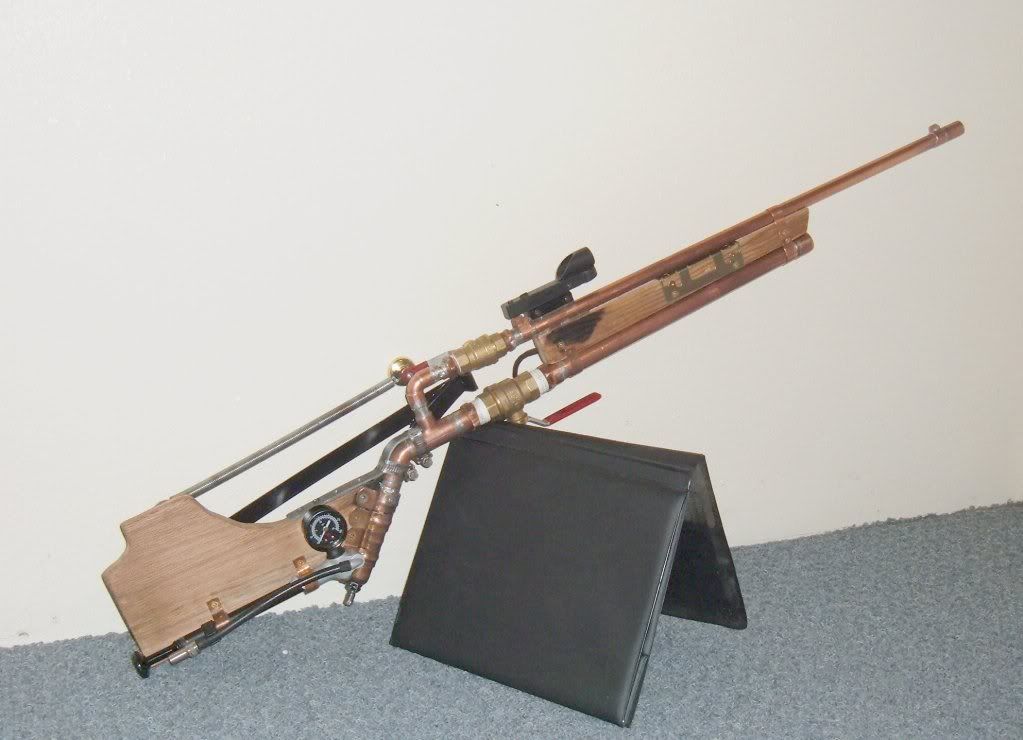
Here's some more pics, enjoy! and be sure to let me know what you think!

Posted: Mon Mar 23, 2009 2:08 pm
by jonnyboy
Looks good although I still think you should use a piston valve.

Posted: Mon Mar 23, 2009 2:34 pm
by john bunsenburner
Yes that is kind of wasteful to make such a nice gun and then to put a BALL VALVE onto it. After you understand how it takes 5-10mins to make a piston valve, the only thing that takes a while is letting epoxy harden in the case of an epoxy piston. Or atleast a QEV or a hammer vlave just not a BV and not a sprinkler. Otherwise a nice gun, i like the copper and i like the woad on it, good job.
Posted: Mon Mar 23, 2009 5:49 pm
by clide
Aww I was all excited because I thought it was mounted to the helmet. I was disappointed to see that the helmet was just propping it up.

Looks great. I think it definitely needs a breech loader.
Posted: Mon Mar 23, 2009 6:03 pm
by Xtazz
Very nice cannon !
We want damage pics !
Posted: Mon Mar 23, 2009 6:27 pm
by psycix
At first I didnt even notice the BV, I just assumed the thing had a piston or QEV slapped on.
The gun looks nice. It seems like you've really put some effort into it.
Maybe you could "clean it up", its a bit messy here and there.

AND USE A BETTER VALVE

Posted: Mon Mar 23, 2009 6:45 pm
by jackssmirkingrevenge
Posted: Mon Mar 23, 2009 7:41 pm
by Big-E
Actually, I'm rather pleased with the performance, I'll try to get some damage pics up soon, now that the weather is nicer.
Yes, I know pistons are easy, I wanted to make a ball valve launcher for the challenge of it. I think ball valves have gotten a bad rep, but it's all good. it's simple, and parts are easily swapped. Oh, and I like it a bit messy too; still, the pics don't do it justice. I build cars, and I tend to like my cars to work mechanicaly rather than look nice.
I want to get started on another one soon. Probably a QEV-based one, but I'm considering a hammer valve of some sort too. One piston idea i've been considering is a pepperbox rifle (with three or four barrels)
and no, it's not helmet mounted, that'd be some serious neck strain there. In fact, I wouldn't trust the helmet as a helmet, it's way old and way outdated. Mostly the helmet is a conversation piece.
As for everything else, you can see the original write-up on the project to see it in an earlier stage.
http://www.spudfiles.com/forums/kopperb ... 17473.html
as I said in that first thread, it's an ongoing work in progress. it may never be completely done, but I'm fairly happy with it for now.
Posted: Mon Mar 23, 2009 9:12 pm
by sputnick
I can't get over how good this friggin gun looks, if you updated to a QEV, I think you would officially become my personal hero for combining very strangely appealing aesthetics and function in one!
Posted: Tue Mar 24, 2009 10:38 am
by suburban spudgunner
This is my favorite type of design: Organized Chaos (which happens to be in the form of a rifle). Great job.
Posted: Tue Mar 24, 2009 2:07 pm
by Big-E
Well, I just got back in town, while I was out, I bought a generous length of 1/2" coupling (I can't get it in the hardware store by me). I have enough to add a breech to two barrels but I may save it for the next project, Which is currently on the drawing board. I would get some damage pics for you, but it's currently raining, so it'll have to wait until things dry out a little.
I think I'm going to take a bunch of the critique from this thread, and apply it to the next build. So far, the next launcher will:
* Be less rough looking
* Use a QEV as the main valve
*Feature a nice breech
additionally, I will keep current features such as:
-variable chamber size
-Swapable barrels
-plenty of wood
While I was buying the coupler, I saw some nice four-port copper log-style manifolds in the plumbing section, I somehow think that I will integrate one into my next design; it opens up many possibilities.
Thanks for all the input, everybody! I am sure you'll like the next build a lot more!

Posted: Sun Apr 19, 2009 4:47 pm
by PinHead
Don't be ashamed of the comments, there's nothing wrong with starting with a ball valve... and a spring loaded one is just as cool.
And don't think some of us didn't notice the killer pinstriping on all your stuff there... please tell me you did those yourself, being a fellow welder/car guy... notice the name, I'm one as well.

Posted: Mon Apr 20, 2009 11:58 am
by Big-E
Don't be ashamed of the comments, there's nothing wrong with starting with a ball valve... and a spring loaded one is just as cool.
And don't think some of us didn't notice the killer pinstriping on all your stuff there... please tell me you did those yourself, being a fellow welder/car guy... notice the name, I'm one as well. Wink
Actually, I was never ashamed of using a ball valve. I wanted to use a ball valve. They're quite reliable, have great flow and are easily replaced if they wear out. Springloading them definitely improves their performance, and I am very satisfied with my choice to use one on this build.
As for the pinstriping, yes, it's all me. I tend to use Mack swords ranging from 0-000 most of the time, I use one-shot enamel primarily (house of Kolor striping paint is great, but very expensive). I also weld a bit, and work on cars a lot. I'm currently building a '38 Chevy Master Deluxe coupe; I'm turning it into a nostalgic straight-axle gasser. Spudguns are a fun diversion while waiting for the latest round of parts to get delivered, though.
I'm still planning out my next pneumatic, I will most likely have it done sometime this summer. I definitely am considering a qev and regulated CO2 for that one. Sometimes it's hard to prioritize my spare time beween automotive projects and spudguns... well, not really, I tend to focus on cars more.

I'll post some damage pics soon. The weather has been great lately (until today; it decided to snow again) If I can make a video, I'll post that too.
Posted: Thu Apr 30, 2009 6:51 pm
by mikemurph
Its got a cool steam-punk look to it
Posted: Thu Apr 30, 2009 7:30 pm
by VH_man
I Drooled over those pictures. Its sexy man. Just sexy.
I like those sites. Any info on how i could construct a set of those?


 Valve is like butter now, and cracks all the way open. I also welded the trigger spring up and painted it black (I know the paint will chip; it's to keep away rust, I want it to become weathered over time for that steam-punky look.)


