How I built my 2" piston valve
-
- Specialist 2
- Posts: 200
- Joined: Sun Nov 09, 2008 4:50 pm
Materials needed:
2" Female adapter thread x slip
2" Tee
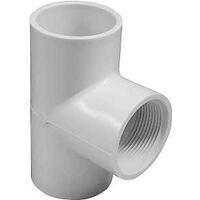
2 Inch Slip x 1 1/2 Inch FPT Reducer
except inside is threaded
1 1/4 Coupling
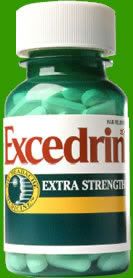
Excedrin Bottle:
Steps:
Take a piece of 2" pipe 2.8 inches long and glue it into one of the horizontal sides of your tee and then the female adapter.
After that grab your reducer and 1/4 coupling.
Cut your 1/4 off your coupling, make sure it is perfectly straight.
Grab your glue and primer then lay your reducer flat down this is crucial.
Apply primer to the inside of the reducer and on your coupling, then do the same with the glue and put your coupling in the inside of your reducer like so.
*image borrowed from unisonmind
mine goes to the line in the middle of the tee
Let that settle for few minutes, once it has primer the other side of your tee and the outside of the reducer, then glue both and push it in.
The Excedrin bottle is used as a piston, I put a few layers of tape in there and it works great, I've tried numerous things, but this is by far my favorite.
So grab an old Excedrin bottle and wrap it with tape then grab a drill and put it through the bottle and grab a bolt, a 2" washer, and a 2" neoprene gasket and twist it in. The piston works perfect, tested at 20 PSI, 40 PSI, 60 PSI, and 80 PSI. It is loud no matter what!
I redid my pilot valve, though heavier I like it a lot more.
I have a schedule 80 male hex plug in the back with a 1/2 threaded hole with a 1/2 close nipple coming out into the vertical of a 1/2 tee. Off the left side I have a 1/2 x 1/4 reducer, coming out of that is a 1/4 close nipple into a 1/4 tee. On one side I have a quick connect and on the other I have my pressure gauge. Back to the other side of the 1/2 tee. I have another 1/2 close nipple going into a 1/2 to 1" reducer. From the 1" side of the reducer I have 1" close nipple which then goes into my modified 1" sprinkler valve.
I'll upload more pictures videos when I have more time. I thought this was a pretty good walk through, any questions let me know.
P.S. Don't forget a bumper!!!
Always remember to primer both parts, fittings first so you can set them down while you do the pipe, and apply a generous amount of glue.
-
- Private
- Posts: 15
- Joined: Fri Feb 06, 2009 10:41 pm
could you email me a pic of your finished piston?
Edit by MrC: Post the picture, don't email. This is a forum.
-
- Private
- Posts: 15
- Joined: Fri Feb 06, 2009 10:41 pm
I am curious how the pill bottle looks
- iisthemuffin
- Specialist 4
- Posts: 497
- Joined: Sun May 11, 2008 2:38 pm
Then take a look at the picture he posted of it....bamaboy2006 wrote:I am curious how the pill bottle looks
Poop.
-
- Private
- Posts: 15
- Joined: Fri Feb 06, 2009 10:41 pm
I know what a pill bottle looks like!! I wanted to see what the finished bottle looks like.
-
- Specialist 2
- Posts: 200
- Joined: Sun Nov 09, 2008 4:50 pm
I'll be posting this tomorrow guys, as well as a newly designed piston sometime this week, step by step with a lot of pictures. Any other questions feel free to ask. Thanks in advance.
-
- Specialist 2
- Posts: 200
- Joined: Sun Nov 09, 2008 4:50 pm
Here's a rough idea of what my new piston will be.
maroon= short length of 1.25 pipe.
Blue= Bolt
Pink= neoprene gasket
light green= Washers, there is a size that fits 100% perfect inside 1.25 couplings and end caps etc etc.
Purple= O ring.
Light blue/ light green part, = Spring with ball bearing glued on.
A short length of 1.25 pipe with 1 1/4 caps on each side.
The pipe length should b to the point where if you put the caps full on both ends, a small amount would b available in the middle for an O-ring.
With that being said here is my valve, o-ring with a check valve.
I'll upload the actual pictures when it's done but that's a rough idea of the new piston should increase performance by a good amount.
-
- Private
- Posts: 15
- Joined: Fri Feb 06, 2009 10:41 pm
Does the bolt run all the way through? Rubber washers?
-
- Specialist 2
- Posts: 200
- Joined: Sun Nov 09, 2008 4:50 pm
The bolt does not, you will need a nut on the opposite side Neoprene fender washers. They will provide a better seal rather than if it were to press against a steel washer. Here is a picture of what they look like
http://powerandplay.com/truck_accessori ... N_81-0151/
-
- Specialist 2
- Posts: 200
- Joined: Sun Nov 09, 2008 4:50 pm
here's a sample at 40 PSI.
[youtube][/youtube]
I'll take videos of the damage this weekend if its nice out, missed out this weekend when it was beautiful out. Also the pressure is dropping off because there is a small leak on the sealing, I can hear air flow out the barrel but its very little can anyone tell me why this might be happening.
All the info you should need is in the first post, except the piston is a 1 1/4 coupling wrapped in duct tape.
Also the gauge is terribly broken, some days it's at 20 others 40, and sometimes 60. Can anyone tell me as to why this might be happening?
- metallover
- Private 4
- Posts: 95
- Joined: Fri Apr 18, 2008 12:20 pm
If you tried the gauge in the cold that would effect it. If you've been at the same temp the whole time I think your gauge has issues.
-
- Private 4
- Posts: 67
- Joined: Sat Mar 07, 2009 2:18 am
- Location: dd
- Contact: