How I built my 2" piston valve
Posted: Mon Jan 26, 2009 9:19 pm
Materials needed:
2" Female adapter thread x slip

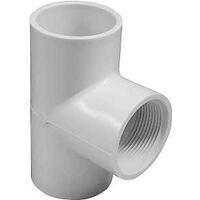
2" Tee

2 Inch Slip x 1 1/2 Inch FPT Reducer

except inside is threaded
1 1/4 Coupling

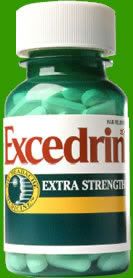
Excedrin Bottle:

Steps:
Take a piece of 2" pipe 2.8 inches long and glue it into one of the horizontal sides of your tee and then the female adapter.
After that grab your reducer and 1/4 coupling.
Cut your 1/4 off your coupling, make sure it is perfectly straight.
Grab your glue and primer then lay your reducer flat down this is crucial.
Apply primer to the inside of the reducer and on your coupling, then do the same with the glue and put your coupling in the inside of your reducer like so.

*image borrowed from unisonmind
mine goes to the line in the middle of the tee

Let that settle for few minutes, once it has primer the other side of your tee and the outside of the reducer, then glue both and push it in.
The Excedrin bottle is used as a piston, I put a few layers of tape in there and it works great, I've tried numerous things, but this is by far my favorite.
So grab an old Excedrin bottle and wrap it with tape then grab a drill and put it through the bottle and grab a bolt, a 2" washer, and a 2" neoprene gasket and twist it in. The piston works perfect, tested at 20 PSI, 40 PSI, 60 PSI, and 80 PSI. It is loud no matter what!
I redid my pilot valve, though heavier I like it a lot more.
I have a schedule 80 male hex plug in the back with a 1/2 threaded hole with a 1/2 close nipple coming out into the vertical of a 1/2 tee. Off the left side I have a 1/2 x 1/4 reducer, coming out of that is a 1/4 close nipple into a 1/4 tee. On one side I have a quick connect and on the other I have my pressure gauge. Back to the other side of the 1/2 tee. I have another 1/2 close nipple going into a 1/2 to 1" reducer. From the 1" side of the reducer I have 1" close nipple which then goes into my modified 1" sprinkler valve.

I'll upload more pictures videos when I have more time. I thought this was a pretty good walk through, any questions let me know.
P.S. Don't forget a bumper!!!
Always remember to primer both parts, fittings first so you can set them down while you do the pipe, and apply a generous amount of glue.
2" Female adapter thread x slip

2" Tee

2 Inch Slip x 1 1/2 Inch FPT Reducer

except inside is threaded
1 1/4 Coupling

Excedrin Bottle:

Steps:
Take a piece of 2" pipe 2.8 inches long and glue it into one of the horizontal sides of your tee and then the female adapter.
After that grab your reducer and 1/4 coupling.
Cut your 1/4 off your coupling, make sure it is perfectly straight.
Grab your glue and primer then lay your reducer flat down this is crucial.
Apply primer to the inside of the reducer and on your coupling, then do the same with the glue and put your coupling in the inside of your reducer like so.

*image borrowed from unisonmind
mine goes to the line in the middle of the tee

Let that settle for few minutes, once it has primer the other side of your tee and the outside of the reducer, then glue both and push it in.
The Excedrin bottle is used as a piston, I put a few layers of tape in there and it works great, I've tried numerous things, but this is by far my favorite.
So grab an old Excedrin bottle and wrap it with tape then grab a drill and put it through the bottle and grab a bolt, a 2" washer, and a 2" neoprene gasket and twist it in. The piston works perfect, tested at 20 PSI, 40 PSI, 60 PSI, and 80 PSI. It is loud no matter what!
I redid my pilot valve, though heavier I like it a lot more.
I have a schedule 80 male hex plug in the back with a 1/2 threaded hole with a 1/2 close nipple coming out into the vertical of a 1/2 tee. Off the left side I have a 1/2 x 1/4 reducer, coming out of that is a 1/4 close nipple into a 1/4 tee. On one side I have a quick connect and on the other I have my pressure gauge. Back to the other side of the 1/2 tee. I have another 1/2 close nipple going into a 1/2 to 1" reducer. From the 1" side of the reducer I have 1" close nipple which then goes into my modified 1" sprinkler valve.

I'll upload more pictures videos when I have more time. I thought this was a pretty good walk through, any questions let me know.
P.S. Don't forget a bumper!!!
Always remember to primer both parts, fittings first so you can set them down while you do the pipe, and apply a generous amount of glue.
