Step by step to building a cheap oak stock
Posted: Mon Mar 16, 2009 1:27 am
Not to long ago, I made a copper coaxal gunand added a little stock on it. The stock proved to be popular, even though it was a little afterthought. Anyways, someone mentioned that a step by step would go over well, so here we are. Reading my attempt at a "how to".
Firstly, I have to apologize to the fact that a few pictures were deleted from my camera. My 2 year old girl loved to push buttons (usually mine). Secondly I have to state that I am no expert on this subject. This is my second attempt at a wood stock and I have limited tools, So I consider this more of an "explanation on how I did it" and not so much a "this is how it IS done". Make sense?
So anyways, I started out looking for a piece of wood. My last one was just a simple piece of pine (house building lumber). I wanted better. I looked into oak and was scared away by the prices. a 2 inch by 2 inch by 36 inch chunk was 38 bucks at my local Lowes. Too small and still about 40 bucks? I then came up with the idea of laminating 2- 1x10 inch chuncks together. One by six or eight would have been fine, but I had the ten inch stuff in my garage from some other project. Three foot sections of 1x6 should be in the 10 dollar range each if you go to Lowes or Home Depot.
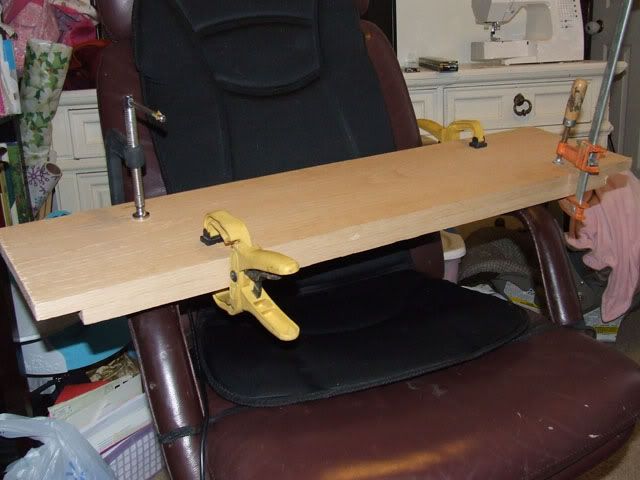
So anyways, To laminate 2 pieces together, make sure both sided that are being glued together are cleaned, I just used a wet rag to wipe them. Then using another rag and a good amount of wood glue, cover One side with a thin layer of the wood glue. Apply the pieces of wood together and then clamp them tight. Leave them clamped for how ever long the bottle of glue states, mine says to leave clamped 30 minutes.
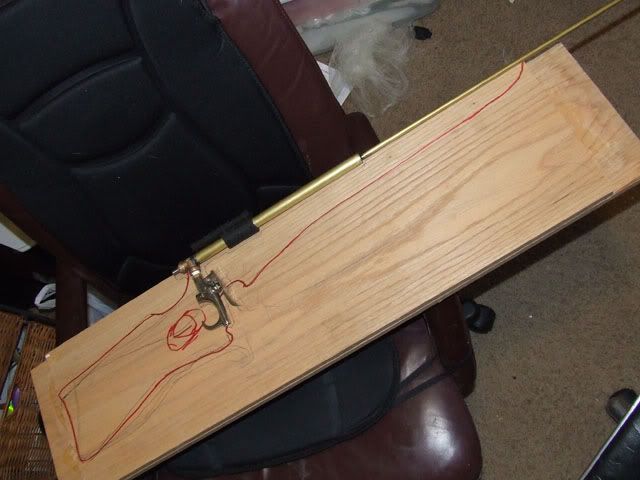
After the glue sets up, It is time to Draw out the shape. I held my coaxal in place and then went to town with a pencil. The pencil was great because it is light. Once I got the pencil drawing worked out, I did a darker marker line of the general shape. As for the distance from the butt of the stock to the trigger, I just copied my BB gun at 13 inches from the butt to the trigger.
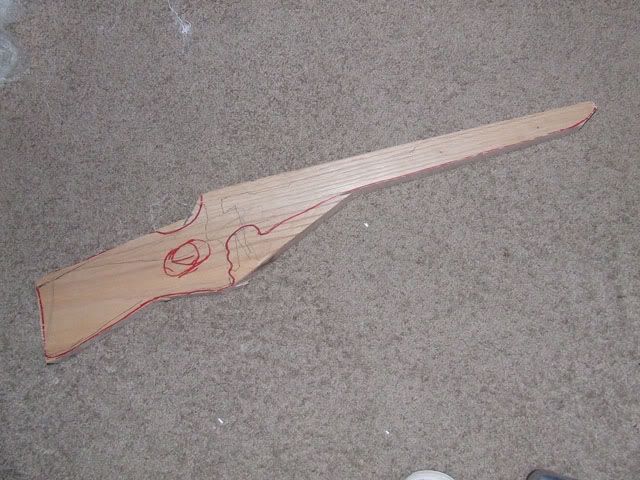
Depending on your tools, this next step is either much easier of much more difficult. I used a skillsaw and sawzall since that is all I had (a framers cutting tools). A band saw or even a jigsaw would have been way faster and easier. Oh well, doing this by hand would have taken a lot longer. So for me it was cut out what I could with skillsaw, finish with sawzall. I also drilled a hole for the start of my thumbhole. The biggest drill bit I had was 7/8 inch. I wish I had 1 1/2 inch.
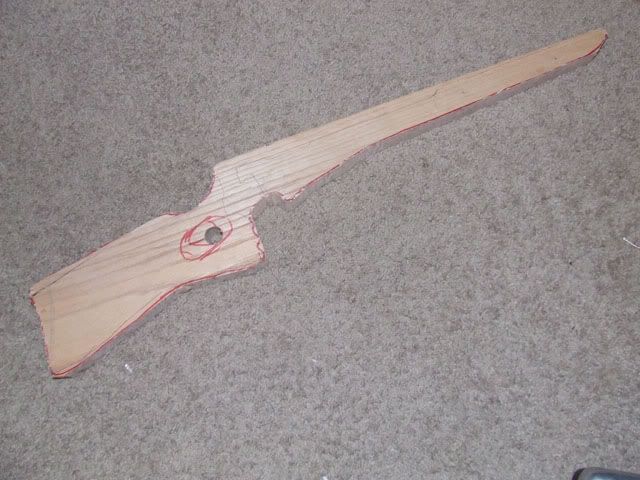
From here on out, its all about how much time you want to put into it (determined by tools on hand sadly). I did find that a hammer and chisel is the quickest way to get a ROUGH shape of what you want. Chisel the shape you want and dont worry too much about how rough it looks, sandpaper is amazing stuff. This is the start of my thumbhole after a bunch of chisel work.
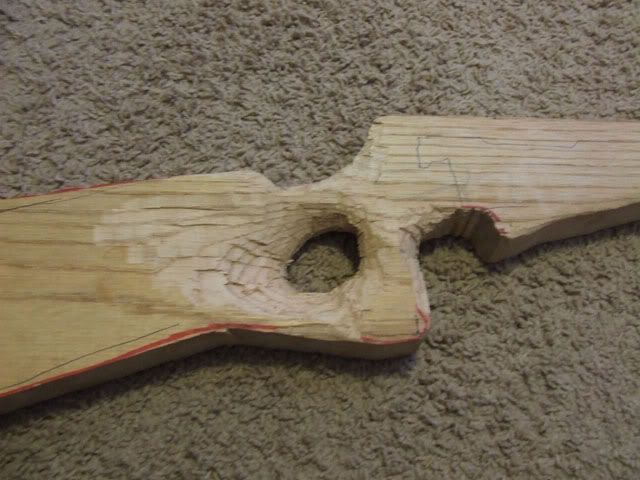
This is the area I have to apologize for the lack of pictures. At least I think words should cover the basics. Once the basic shape is there, it is time to start smoothing out those rough edges. If you have a belt sander, use the crap out of it. If you have a round file, use it in the tight areas (a threaded bolt works well on wood). Use your best judgement as far as how aggressive the grit of paper to use. Start out with rough and work your way towards really fine.
For the groove that the gun fits in, dont worry about making it a perfect half circle. Once the pipe is installed, nobody will see the hard work that went into making that. just make a square groove that is the width of the pipe and half as deep.
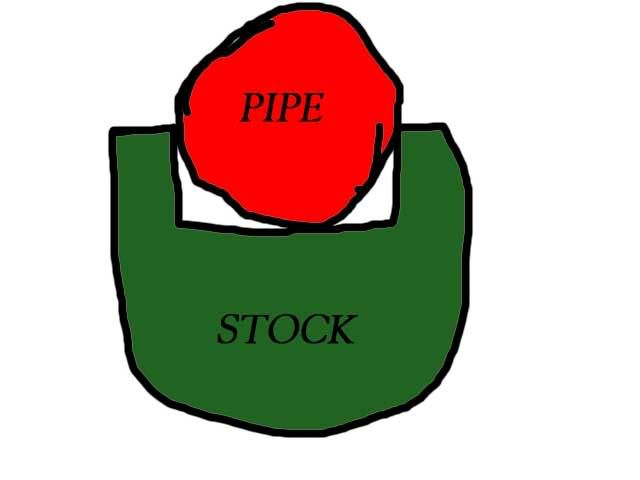
Only worry about making the half circle detail at the very ends of the stock where the pipe exits and it is visible.
Where the blowgun goes through the stock, I used a 5/8 paddle drill bit and cored the hell out of the area. You will be surprised at how much wood materiel needs to be taken out for a simple blowgun.
Sand and finish to your liking, this will probably take a while.
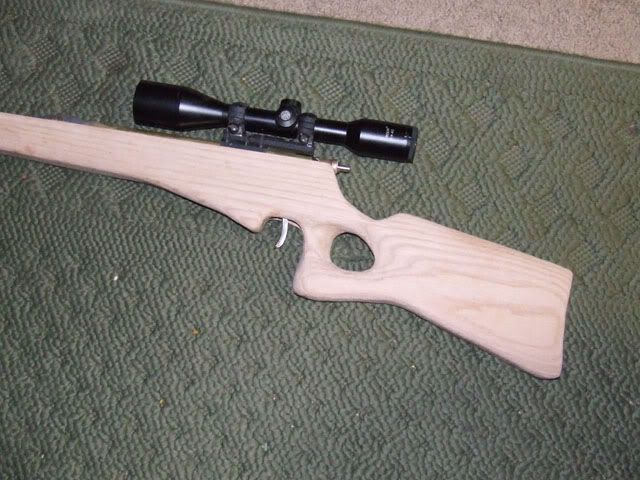
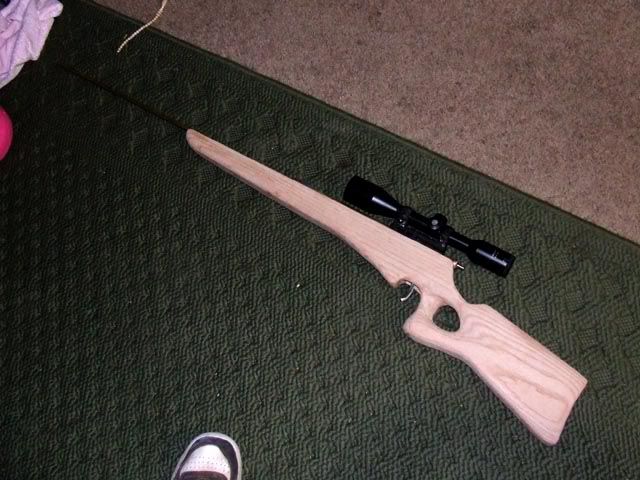
To get ready to stain it (if you choose to), I screwed a screw in the groove where the barrel sits. I tied a piece of string to the end of the screw and hung it from the ceiling so as to not worry about finger prints or setting the finished product in dirt or dust before it dries.
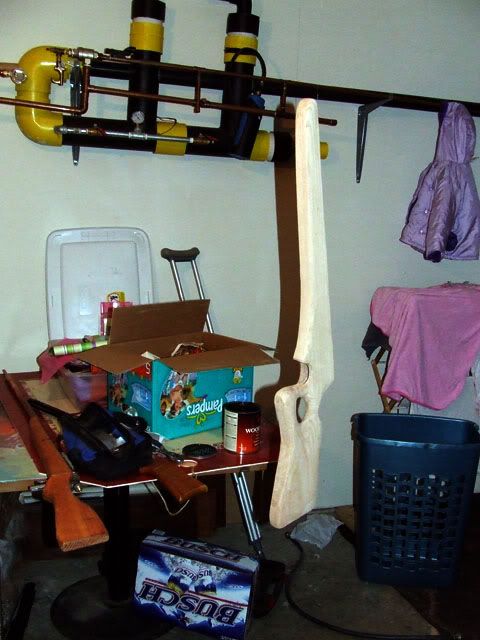
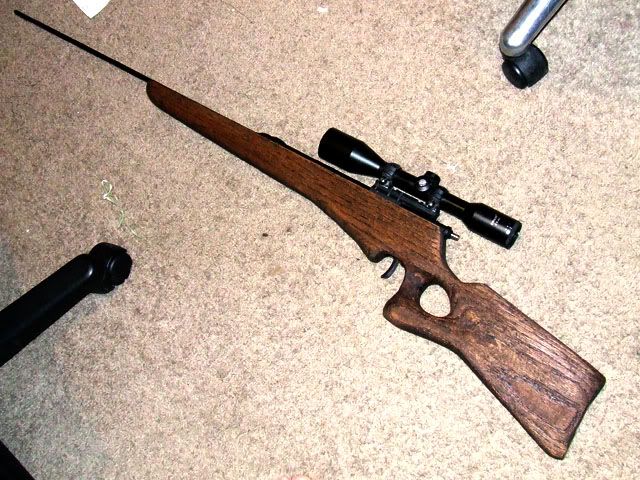
After properly applying any need drop cloth to prevent a mess, apply the stain of your choice using a rag you dont mind throwing away in a bit. One or two coats and you are ready to let it set. Then all you have to do is find a clean way to apply the gun to the stock.
Firstly, I have to apologize to the fact that a few pictures were deleted from my camera. My 2 year old girl loved to push buttons (usually mine). Secondly I have to state that I am no expert on this subject. This is my second attempt at a wood stock and I have limited tools, So I consider this more of an "explanation on how I did it" and not so much a "this is how it IS done". Make sense?
So anyways, I started out looking for a piece of wood. My last one was just a simple piece of pine (house building lumber). I wanted better. I looked into oak and was scared away by the prices. a 2 inch by 2 inch by 36 inch chunk was 38 bucks at my local Lowes. Too small and still about 40 bucks? I then came up with the idea of laminating 2- 1x10 inch chuncks together. One by six or eight would have been fine, but I had the ten inch stuff in my garage from some other project. Three foot sections of 1x6 should be in the 10 dollar range each if you go to Lowes or Home Depot.
So anyways, To laminate 2 pieces together, make sure both sided that are being glued together are cleaned, I just used a wet rag to wipe them. Then using another rag and a good amount of wood glue, cover One side with a thin layer of the wood glue. Apply the pieces of wood together and then clamp them tight. Leave them clamped for how ever long the bottle of glue states, mine says to leave clamped 30 minutes.

After the glue sets up, It is time to Draw out the shape. I held my coaxal in place and then went to town with a pencil. The pencil was great because it is light. Once I got the pencil drawing worked out, I did a darker marker line of the general shape. As for the distance from the butt of the stock to the trigger, I just copied my BB gun at 13 inches from the butt to the trigger.

Depending on your tools, this next step is either much easier of much more difficult. I used a skillsaw and sawzall since that is all I had (a framers cutting tools). A band saw or even a jigsaw would have been way faster and easier. Oh well, doing this by hand would have taken a lot longer. So for me it was cut out what I could with skillsaw, finish with sawzall. I also drilled a hole for the start of my thumbhole. The biggest drill bit I had was 7/8 inch. I wish I had 1 1/2 inch.


From here on out, its all about how much time you want to put into it (determined by tools on hand sadly). I did find that a hammer and chisel is the quickest way to get a ROUGH shape of what you want. Chisel the shape you want and dont worry too much about how rough it looks, sandpaper is amazing stuff. This is the start of my thumbhole after a bunch of chisel work.

This is the area I have to apologize for the lack of pictures. At least I think words should cover the basics. Once the basic shape is there, it is time to start smoothing out those rough edges. If you have a belt sander, use the crap out of it. If you have a round file, use it in the tight areas (a threaded bolt works well on wood). Use your best judgement as far as how aggressive the grit of paper to use. Start out with rough and work your way towards really fine.
For the groove that the gun fits in, dont worry about making it a perfect half circle. Once the pipe is installed, nobody will see the hard work that went into making that. just make a square groove that is the width of the pipe and half as deep.

Only worry about making the half circle detail at the very ends of the stock where the pipe exits and it is visible.
Where the blowgun goes through the stock, I used a 5/8 paddle drill bit and cored the hell out of the area. You will be surprised at how much wood materiel needs to be taken out for a simple blowgun.
Sand and finish to your liking, this will probably take a while.


To get ready to stain it (if you choose to), I screwed a screw in the groove where the barrel sits. I tied a piece of string to the end of the screw and hung it from the ceiling so as to not worry about finger prints or setting the finished product in dirt or dust before it dries.

After properly applying any need drop cloth to prevent a mess, apply the stain of your choice using a rag you dont mind throwing away in a bit. One or two coats and you are ready to let it set. Then all you have to do is find a clean way to apply the gun to the stock.
